Showing posts with label Recipe. Show all posts

Monday, June 23, 2014

Summer Trio

Our CSA at Brad's Produce has officially begun, and we have started getting some of our favorites. Last summer, we were introduced to cucumber dip by the ladies at the farm, and it quickly became one of our favorites. We get so many cucumbers, we don't know what to do with them, so this is a nice way to use them. Unfortunately, it is not super low calorie, by any means, but we are working on making some small changes to help with that.

Cucumber Dip
8 oz cream cheese
1/3 cup mayo
1 medium cucumber, seeded and chopped
1/4 tsp garlic powder
1/2 tsp dill

Combine cream cheese, mayo, garlic and dill until smooth. Add cucumber and stir until well mixed. Best if made day ahead.

This dip is so simple, and versatile. It is great on crackers, especially pita crackers, and we also find it nice on turkey sandwiches. We up the garlic, dill and cucumber, to make it crunchier, and we love the flavor of dill. Last night when I was making this, Paul said that he loves the flavor of dill and thinks that it is not in enough foods that we eat. This brought us to adding more and more dill to the dip, and talking about the fact that you can't have cream cheese and cucumber without dill, the perfect summer trio.

This week, instead of eating it as a dip, we are using it as the spread on our turkey sandwiches for lunch. It gives us the creaminess of mayo, and the crunchiness of the cucumbers, all in one. Now just to figure out a way to cut some of the calories. 

Monday, August 19, 2013

Blueberry Cake

As Paul and I were preparing for our wedding, the church required that we go through a mentoring program before we could get married in the church.  We had a wonderful couple who we still run into and have a wonderful time chatting with when we do see them.  Every week Sharon would make some sort of dessert for us to have during our time together, and one week she made a wonderful blueberry cake.  She explained to us that the recipe actually came from her neighbor who is now blind, but who would make this fantastic cake for them on occasion.  Sharon was kind enough to share the recipe with me, and I have since made it numerous times for various occasions.  Most recently Paul and I had to bring breakfast for Sunday School, so I decided I was going to make the blueberry cake.


Everyone at Sunday School loved the cake, and Little Man loves it too!


Today Little Man tried to lick the plate because he enjoyed it so much.

Blueberry Cake

1 cup softened butter
2 cups sugar
4 eggs
1 teaspoon vanilla
3 cups flour
1 pint blueberries

Cream butter and sugar.  Lightly beat the eggs and mix them with the butter/sugar mixture.  Add vanilla and mix well.  Reserve 1/4 cup flour, add remaining flour to sugar mixture.  Dredge blueberries with reserved flour and fold into sugar/flour mixture.  Pour into a greased fluted pan and bake at 375 for 1 hour.  Dust top with powdered sugar once removed from pan.


Sunday, August 18, 2013

Chocolate Peanut Butter Chip Bars

This dessert is one of Paul's favorites, and one his mom makes fairly frequently during the summer.  Today we were talking, and I mentioned that I wondered how they would taste as chocolate peanut butter chips bars.  This led to an impromptu trip to the grocery store to pick up the necessary ingredients and the experimentation could begin.  Frankly I have been thinking that the recipe could be modified some for a while now, but have come to realize that there are some things that are sacred when it comes to recipes we have been given.  I was super excited when Paul wanted to modify the recipe slightly, gives me the chance to take some tried and true recipes and make them my own.


Chocolate Chip Bars

1 package yellow (or white) cake mix
1/4 cup water
2 eggs
1/4 cup soft butter
1/4 cup brown sugar
1 package chocolate chips

Combine cake mix, water, eggs, butter, and brown sugar.  Stir in chocolate chips.  Bake in a jellyroll pan in a 375 degree oven for 20-25 minutes.

Monday, July 22, 2013

Chocolate Zucchini Bread

Last summer we ended up with an over-abundance of zucchini, so I had to find a way to use some of it.  We are fans of breakfast breads, well actually bread in general, and so I was on a search for a zucchini bread recipe.  I found this recipe from the Joy of Baking, and started shredding zucchini.  As I was making the bread the first time, I realized that there were some ingredients that we either didn't have, or that I couldn't find, so I made some emergency substitutions, and we LOVED it.  We liked it so much that I decided to make it again, this time, with the original ingredients, and while it was good, it just wasn't the same.  So what made the bread so magical?  My secret ingredients...


That's right, Nesquik and Hershey's bars.  I found that there was no stopping a pregnant woman on a mission and I REALLY wanted to make this zucchini bread.  Partially because I was sick of seeing MULTIPLE zucchini sitting on the counter, partially because I was excited about finding a way to "hide" the zucchini in some yummy chocolate bread.

We did make the bread according to the recipe, once the "babybrain" subsided a little and I placed my fingers on the cocoa powder, and frankly, we just didn't like it as much.

Nesquik Zucchini Bread

1 1/2 to 2 cups shredded raw zucchini
1 cup all-purpose flour
1/2 cup Nesquik
3/4 teaspoon baking soda
1/4 teaspoon baking powder
1/4 teaspoon salt
1/4 teaspoon cinnamon
2 Hershey bars chopped
2 large eggs
1/2 cup vegetable oil
1/2 cup granulated sugar
1/2 cup packed light brown sugar
1 teaspoons vanilla extract

Preheat oven to 350.  Grease a loaf pan.

Grate zucchini and set aside.

In a large bowl, whisk together flour, Nesquik, baking soda, baking powder, salt and cinnamon.  Mix in chocolate.

In mixing bowl, beat the eggs, add oil, sugars, and vanilla extract.  Mix until well blended.  Add zucchini and mix well.  Slowly add the flour mixture and blend until combined.  Scrape the batter into the prepared pan and bake until the bread has risen and a toothpick is inserted into the center and comes out clean (55-65 minutes).  Place on a wire rack to cool for about 10 minutes, then remove the bread from the pan and cool completely.

This can be stored at room temperature for a few days, but in our house, we are lucky if it lasts to the second day.

Wednesday, July 3, 2013

Granola Bars

We are always looking for a good granola bar recipe, mostly because we never buy them but always seem to want them.  Last summer I made some, and they were okay, but they were super sticky and it took us a while to eat them.  This summer, I stumbled upon this recipe (a basic granola bar recipe), which I modified slightly for the first batch.  The first time around I made cranberry white chocolate granola bars with some sunflower seeds added.  They were a hit, and within a week they were gone.

Cranberry White Chocolate Granola Bars
3 1/2 cups rolled oats
1 cup sliced almonds
1/8 cup sunflower seeds

1/2 cup craisins
1 cup white chocolate chips
1/2 cup honey
1/2 cup brown sugar
11 T butter, melted
1 egg
1 t vanilla

In a large bow mix oats and nuts.  Spread them evenly into a jelly roll pan, and bake in a preheated 350 oven for 15-20 minutes.

Mix the rest of the ingredients in a bowl (I just the same bowl that I mixed the granola in).  Make sure to let the butter cool a little after it has melted so that it doesn't cook the egg.  

When the granola is done, dump into the bowl and mix well.  I found that mixing with my hands worked much better than with the spoon (although MUCH messier).

Grease jelly roll pan and press the mixture FIRMLY into the pan.  The more firmly it is packed, the less likely the granola bars will be to fall apart.  I used the paper from the butter to press the granola so it wouldn't stick to my hands, next time I think I will use a glass 9x13 pan.

Bake for about 20 minutes or until edges are golden brown.  I baked mine for about 25 minutes until the top was golden brown (mostly because I couldn't see well in the kitchen).

Remove from oven and allow to cool.  Cut into desired size.  I cut the bars in half so that I had two long, narrower pieces of granola bar, then each of those halves into 9 or 10 pieces.  Each bar was wrapped individually in plastic wrap then stored in a gallon-sized zipper bag.

These were a HUGE hit in the house.  Putting in a little extra work up front (by wrapping them individually) made it super easy to grab one on the go.

**As I was writing this post, I was working on our second batch of granola bars.  This time we decided on peanut butter with some chocolate.  I used the same basic recipe, with a few minor changes.

Peanut Butter Granola Bars with Chocolate Drizzle
3 1/2 cups rolled oats
1 cup sliced almonds
1 cup honey roasted peanuts

1/2 cup honey
1/2 cup brown sugar
6 T butter, melted
5 T peanut butter, melted
1 egg
1 t vanilla

These turned out even better than the first time around.  I used a greased 9x9 glass pan in order to press the granola bar mixture into the jelly roll pan, which resulted in a bar that didn't fall apart nearly as quickly as the first batch.  These also weren't nearly as sweet as the first batch.  We didn't realize just how sweet they were originally, but once we tasted these, we knew we had a winner.


Saturday, June 8, 2013

Birthday Cake

On February 14, 2009 my grandmother went home to be with the Lord.  During the time right after her death, I was able to spend time with my family and gather some recipes that were family favorites.  One of the recipes I found that I knew that I wanted to keep handy was the "Birthday Cake" recipe.  I faithfully copied it down, word for word, then tucked it away so that I would be able to find it when I was ready to pull it out and make it.

Four years later, I finally had an occasion to make it.  In April my younger sister, and Little Man's Auntie J, celebrated her 18th birthday.  A couple weeks after her birthday, the family came down to visit and I finally made the cake.  


Auntie J has been going through a pink and zebra print thing lately, so I decided to go with that for the cake.


The pink didn't come out quite as pink as I would have liked, and the frosting wasn't quite what I wanted, but the cake itself tasted great.  The recipe calls for red food coloring, and to make three layers, but I opted for two layers and the zebra type pattern (made by adding a scoop of one color, then the other right in the middle, continuing until the pan is approximately 2/3 full).


Repaal Birthday Cake
  • 2/3 c butter
  • 1 cup sugar
  • 3 cups sifted cake flour
  • 3 teaspoons baking powder
  • 1/3 teaspoon salt
  • 1 cup thin milk
  • 1 teaspoon lemon juice
  • ½ teaspoon almond extract
  • ½ teaspoon vanilla extract
  • 6 egg whites
  • 1 cup sugar

Lightly cream butter and sugar. Sift flour and baking powder three times. Add milk, lemon juice, almond extract and vanilla extract alternately with flour.
Beat egg whites until they hold a point and gradually beat in sugar, continue until stiff and glassy. Fold meringue into batter.
Pour 1/3 of batter in a bowl. Blend in 5 drops red food coloring.
Red layer goes between two white layers.

Wednesday, June 5, 2013

Cake Mix Cookies

Our little family just got home from a "mini-vacation" with my family to celebrate Auntie Julia's high school graduation.


When we got home, we were glad that we had food for lunches and dinner the rest of the week.  Today, during lunch, I realized that I didn't have dessert, and I missed it a little.  So for the second half of the school day, and most of the afternoon, I thought about what I could make for desserts for the rest of the week (yes, with only 2 days left).  We ate a lot of brownies this year, mostly because they are easy to make, and store, and a box can last us for almost 2 weeks of lunches.  I decided that brownies were out, and cookies were in...cake mix cookies.

I was first introduced to them a couple months ago when our family gathered with some friends for dinner and fellowship.  One of the other couples brought cake mix cookies.  They apparently are all the rage right now, and I just couldn't get enough of them.  I asked for the recipe, which she told me right away, and I promptly forgot.  Tonight I found a version that I THINK is pretty much the same as what I was told.

The recipe is pretty basic, and can be changed to suit the palate of whoever is making them.

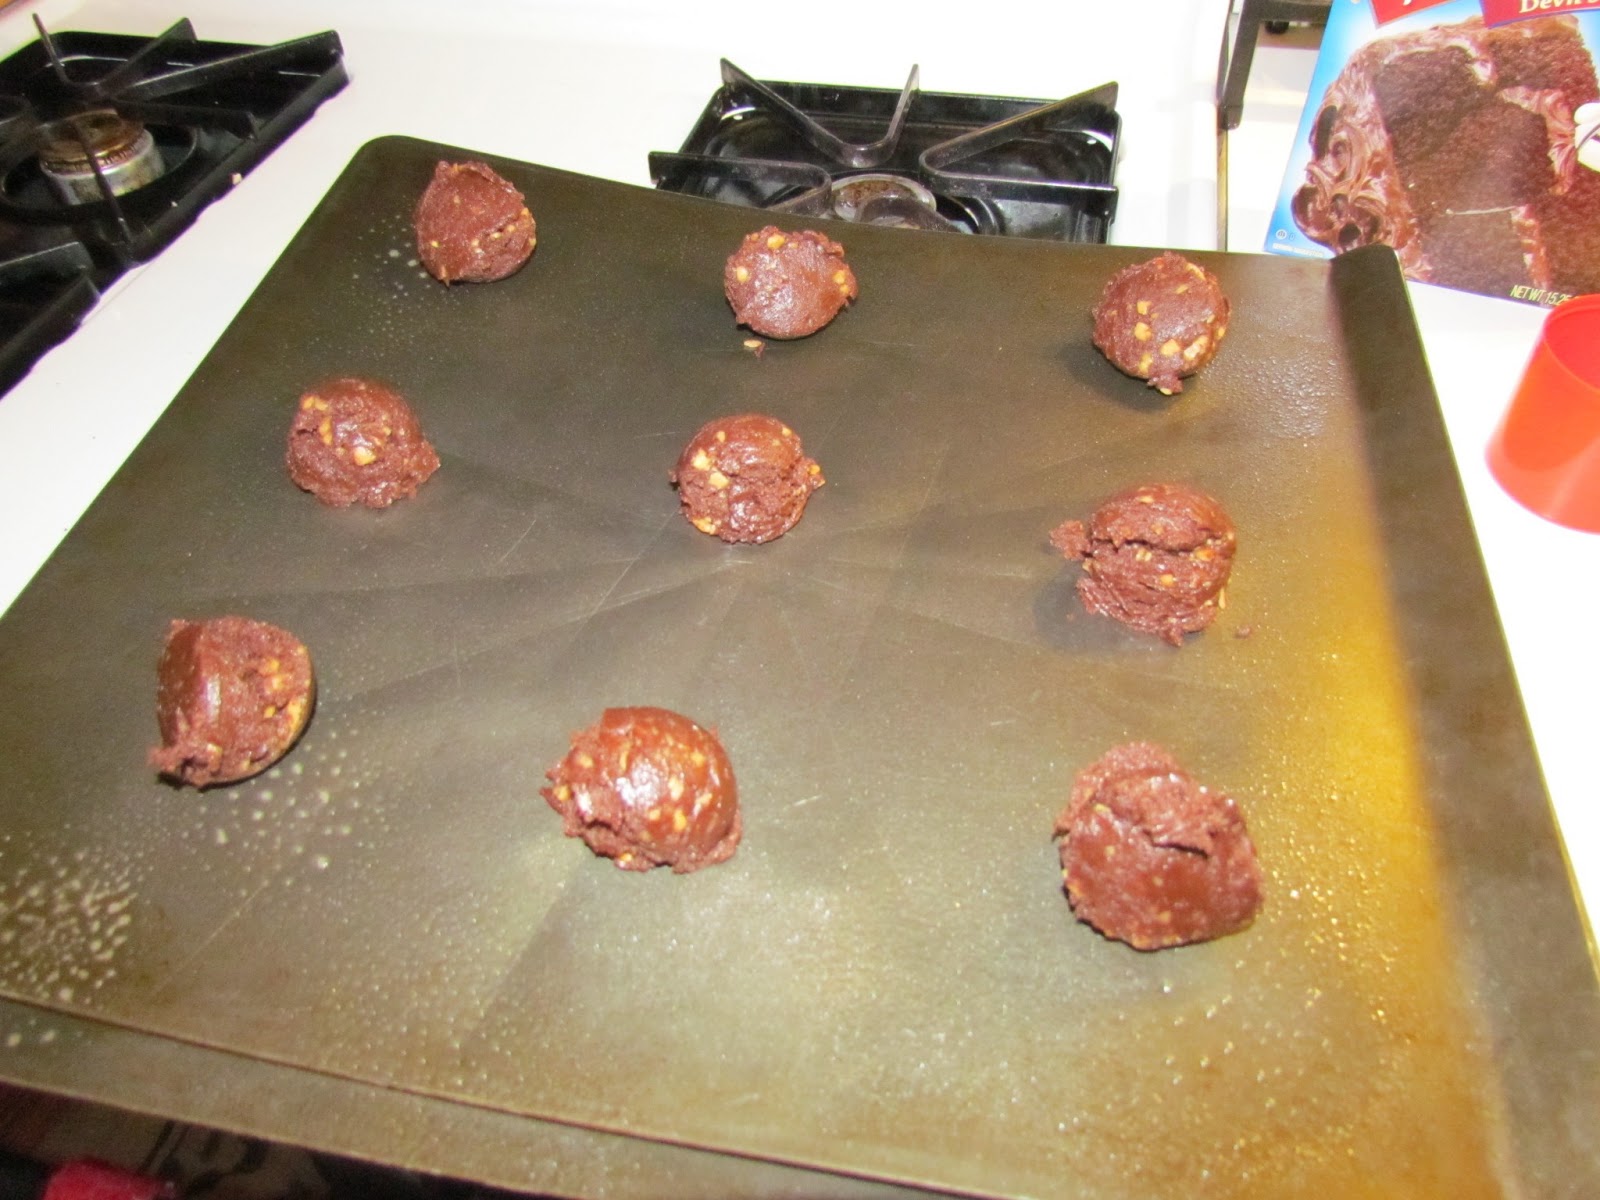
Our friend only had a lemon cake mix, so she mixed in blueberries (AMAZING).  We had quite the variety of cake mixes to choose from, with a few different mix-ins.  I settled on Devil's Food cake mix with Heath bits mixed in.


Into the bowl went the cake mix, oil, and eggs.


And then I grabbed my trusty whisk...BAD IDEA.


Whenever I whip up brownies or cake, I ALWAYS grab the whisk, so tonight I thought I would do the same.  Yeah, that was a bad idea.  This mix is THICK and certainly more like a dough than a batter, so I spent the next few minutes trying to scrape the cookie mix out of the whisk and back into the bowl, and finally, I had a nice dough.


In went the Heath bits, off came the rings, and I started mixing with my hands.


Whenever I make cookies, I pull out my cookie scoop, trying to make sure that every cookie is the same size and onto the cookie sheet she went.


Nine minutes later, I had these beauties.


Totally don't want to wait for tomorrow's lunch to try them, so a couple of them "accidentally" broke when I was taking them off the cookie sheet.  In our family, broken cookies need to be eaten that evening.  


So the basic recipe for these cookies...

Ingredients:
- 1 package yellow cake mix
- 1/3 cup vegetable oil
- 2 eggs
- 2 cups semisweet chocolate chips

Directions:
- Preheat oven to 350.  Grease cookie sheets.
- Pour cake mix into large bowl.  Stir in the oil and eggs until well blended.  Mix in chocolate chips.  Drop dough by teaspoonfuls onto the prepared cookie sheets.
- Bake for 8 to 10 minutes in the preheated oven.  Remove from pan to cool on wire racks.

The possibilities for combinations are endless.  Looking forward to being able to try some other combinations.

Tuesday, February 5, 2013

Baby Sweet Potatoes

Paul and I made the decision shortly after finding out that we were expecting that we wanted to make our own baby food with as much local produce as possible.  Since Little Man is going to start "eating" soon, and well, it is February, it is difficult to find fresh, local produce, but we are still committing to making food.

We have started with sweet potatoes because they were $0.59 per pound last week at one of the grocery stores, so we picked up these two beauties for less than $2.00.


The next step was to cook them, and because they were so large, I had to pull out our large stock pot.  


I cooked them according to The Betty Crocker Cookbook (10th edition).  Cover them with water, then boil for 20-25 minutes, until they are soft.  Once they were cooled, I was able to pull off the skins.


Then into the Baby Bullet (Thanks Nynna!  Best Christmas present ever!).  One sweet potato, one cup of water, pulsed for about 10 seconds, or until smooth.


Then into single portion containers.  One sweet potato made 16 approximately 1 tablespoon portions (give or take, I used a large cereal spoon to measure).  Tomorrow I will tackle the second (mostly because I have more containers to wash).  It still blows me away, approximately 32 portions of sweet potatoes for less than $2.00!

Friday, December 21, 2012

Christmas Favorites

This week has been crazy.  It's going very fast, and I feel like we're not going to get everything done before my family arrives sometime on Saturday.  Not only are we attempting to get the house clean, but we have many baking and cooking projects that I would like to get done.  The last think I want to do when everyone is here is have to bake and cook. 

This year I am only making three different cookies, with two different types of dough.  It is a bit of a relief to know that I will only be making sugar cookies (both cutout and drop), peanut butter blossoms and peanut butter cookies. Both recipes come from family.  For our wedding, my mother-in-law asked members of our family to send her recipes to put in a box for us.  It was one of the best gifts that we received, and these two cookies have been a big hit.  To make things better, the recipes are both super easy to make as well.

Sugar Cookies
(as written...I know, no times)

1 cup butter
1 cup canola oil
1 cup granulated sugar
1 cup powdered sugar
2 eggs
4 cups flour
2 teaspoons vanilla
1 teaspoon cream of tartar
1 teaspoon salt
1 teaspoon baking soda

Mix well.  Drop 1 teaspoon on ungreased cookie sheet.  Press flat with a glass glass dipped in granulated sugar.  Bake 350 but watch closely as oven vary.  The cookie will barely turn brown.  Delicious one after the other!

Edits:  Last year I found that flattening the cookie made them crisper than I like.  I rolled them into a ball and then rolled in granulated sugar and baked them that way.

Candy Kiss Peanut Blossoms

1/2 cup sugar
1/2 cup brown sugar
1/2 cup shortening
1/2 cup peanut butter
1 egg
2 tablespoons milk
1 3/4 cup flour
1 teaspoon baking soda
1/2 teaspoon salt
1 teaspoon vanilla
48 candy kisses

Cream together first four ingredients.  Add egg and milk, mix well.  Slowly add flour, soda, salt and vanilla.

Make 1 inch balls and roll in sugar.  Bake 375 8-10 minutes.  DO NOT OVERBAKE.  They are better when under done.  Pull from oven and top with candy kiss.